
Our Location
304 North Cardinal St.
Dorchester Center, MA 02124

Original price was: ₨ 5,000.₨ 4,900Current price is: ₨ 4,900.
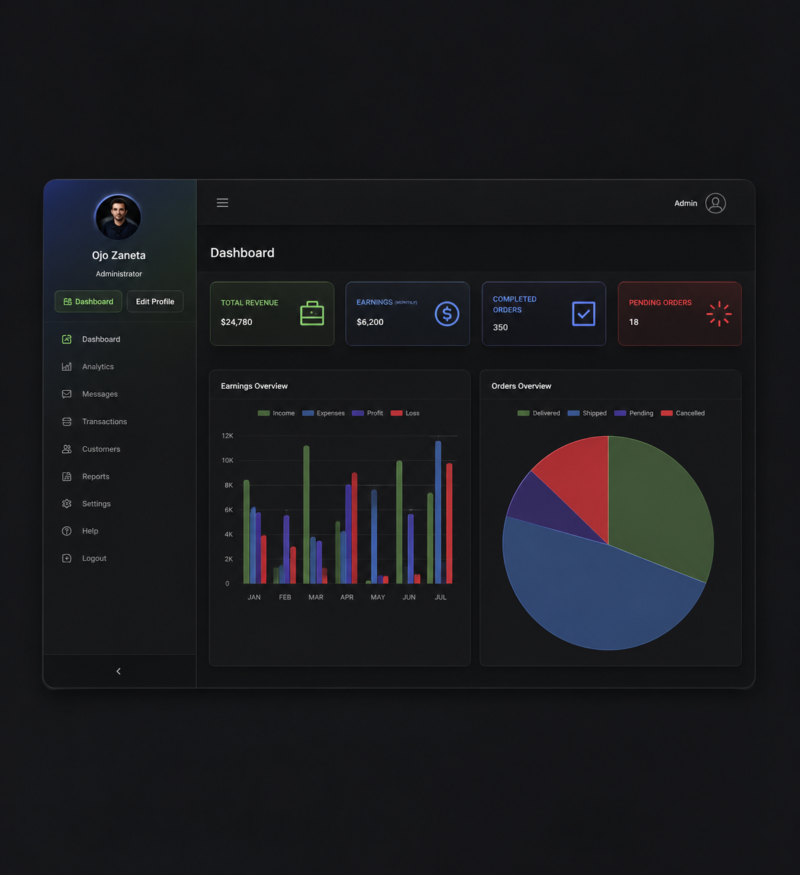
full-stack mobile repair service management platform built with Next.js and Express. It features dedicated dashboards for admins, super admins, and customers—enabling service request tracking, appointment scheduling, technician assignment, payment processing via Stripe, real-time messaging, and comprehensive reporting.
- Dynamic home page, serving as the landing page for all users.
- Admin and user dashboards.
- User login page with professional handling of all kinds of validations.
- **Service Request Management:** - View and manage repair service requests, assign them to technicians, and update the status.
- **Appointment Scheduling:** - Manage appointment schedules, including adding, modifying, or canceling appointments.
- **Technician Management:** - Manage technician schedules, assignments, and workloads.
- **Payment Verification:** - Verify and process payments made by customers.
- **Customer Management:** - Manage customer accounts, including account creation.
- **Communication:** - Communicate with customers and technicians to provide updates, address concerns, and resolve issues.
- **Reporting and Analytics:**
- ** User Role Management:** - Super Admins can create, modify, or delete admin accounts and have access to all functionality.
- **Registration and Login ** - Customers can create accounts and log in to access the website's features.
- **Service Request:** - Users can request repairs for their mobile devices, providing details such as device type, issue description, and preferred appointment time.
- **Service Tracking:** - Track the status of repair requests, including updates on progress and estimated completion times.
- **Appointment Booking:** - Schedule repair appointments, choosing from available time slots.
- **Payment Processing:** - Make secure online payments for repair services.
- **Order History:** - View repair order history, including invoices and receipts.
- **Messaging and Notifications:** - Receive notifications about repair updates and communicate with the service team.
- ** Profile Management:** - Update personal information, including contact details and payment methods.
http://localhost:3000 or another specified URL.
git clone https://github.com/Ujjalzaman/Repair-mobile-nextjs-full-stack.git
cd client
npm install
Setup environment for the frontend: Under the src/app folder, create an env.local file.
Set the following credentials in the env.local file:
NEXT_PUBLIC_API_BASE_URL=http://localhost:3030/api/v1  # Replace with your backend link
NEXT_PUBLIC_STRIPE_PUBLISHABLE_KEY=pk_test_5454747d54  # Replace with your Stripe publishable key for the payment gateway
STRIPE_SECRET_KEY=sk_test_656565  # Replace with your Stripe secret key
To set up an Express API in the "./api" directory of a project, you can follow these steps:
1. Install the required dependencies by running npm install or yarn install in the terminal and including the express module as a dependency.
2. Set up the server and configure middleware in a file such as index.js within the "./api" directory. Import the express module and create an instance of an express application, set up routes for handling HTTP requests, and configure middleware for handling requests and responses.
3. Set up environment variables for the project by creating a file such as .env in the root directory and specifying key-value pairs for any environment-specific variables, such as a port number or database credentials.
4. Start the server by running a command such as node index.js or nodemon index.js in the terminal.
5. Test the API by sending HTTP requests to the server using tools such as Postman or cURL.

```bash
cd api
npm install
```
Setup environment for the backend:
Create a .env file in the api directory.

Set the following credentials in the .env file:

```bash
DATABASE_PROD_URL=database url
NODE_ENV='development'
PORT=5051
JWT_SECRET=secret key
JWT_EXPIRED_IN=30d
JWT_REFRESH_SECRET=refresh token
JWT_SECRET_SALT_ROUND=10

# Cloudinary
CLOUD_NAME=dg8dkpulv
API_KEY=454831555123244
API_SECRET=t7UWrk_ZpfWm1rGsGskWyn2TDJI
NEXT_PUBLIC_STRIPE_PUBLISHABLE_KEY=stripe publishable key
STRIPE_SECRET_KEY=stripe secret key
```
In this project use nodejs 20



Reviews
There are no reviews yet.